Donations
Donations
Add a charity to your event to allow customers to make a donation at checkout.
How To Set Up Donations for Your Event
-
Go to Your Event
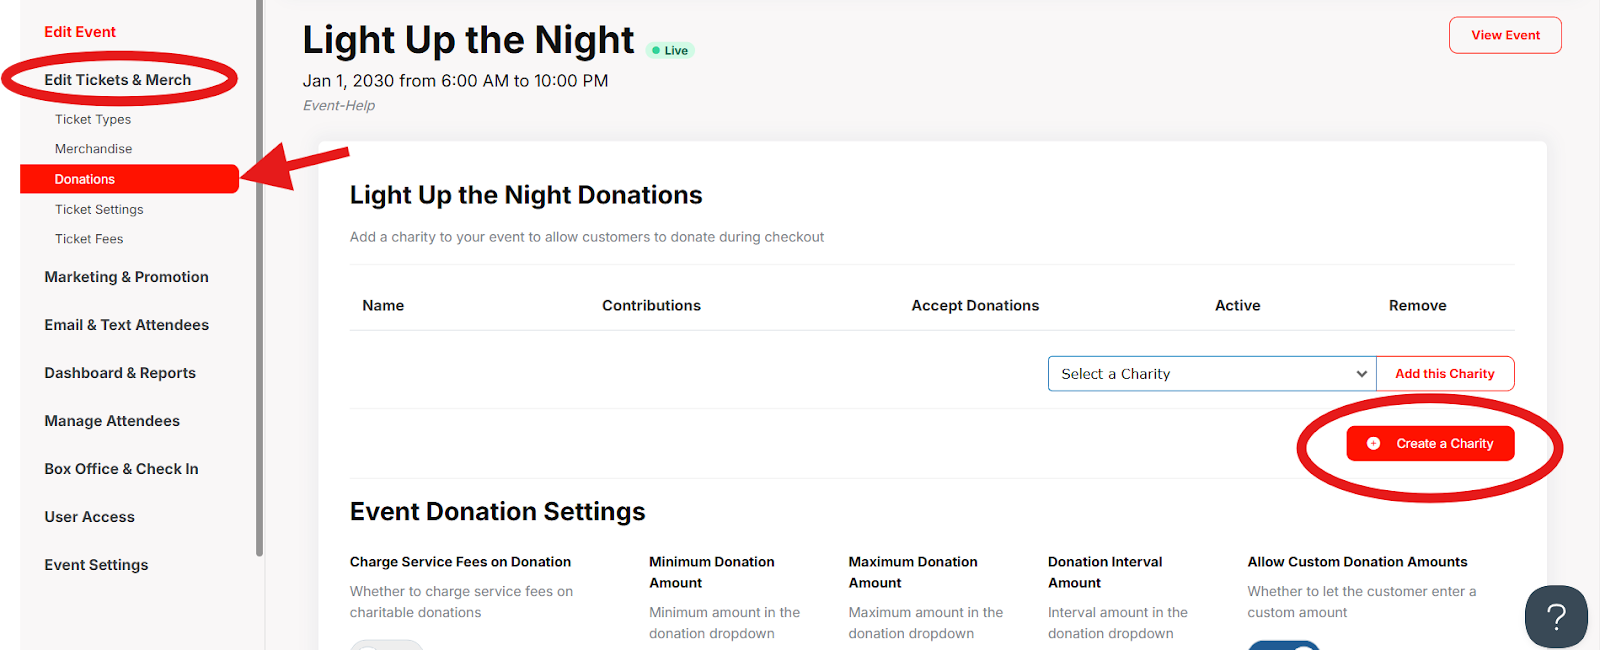
Navigate to your event and select Edit Tickets & Merch > Donations.
- Add or Create a Charity
-
If your organization already has a charity set up, select it from the dropdown and click Add this Charity.
If not, click Create a Charity.
Fill in the following:
- Charity name
- Description (optional)
- Associated organization
-
Website URL (optional)
Click Save when finished.
-
-
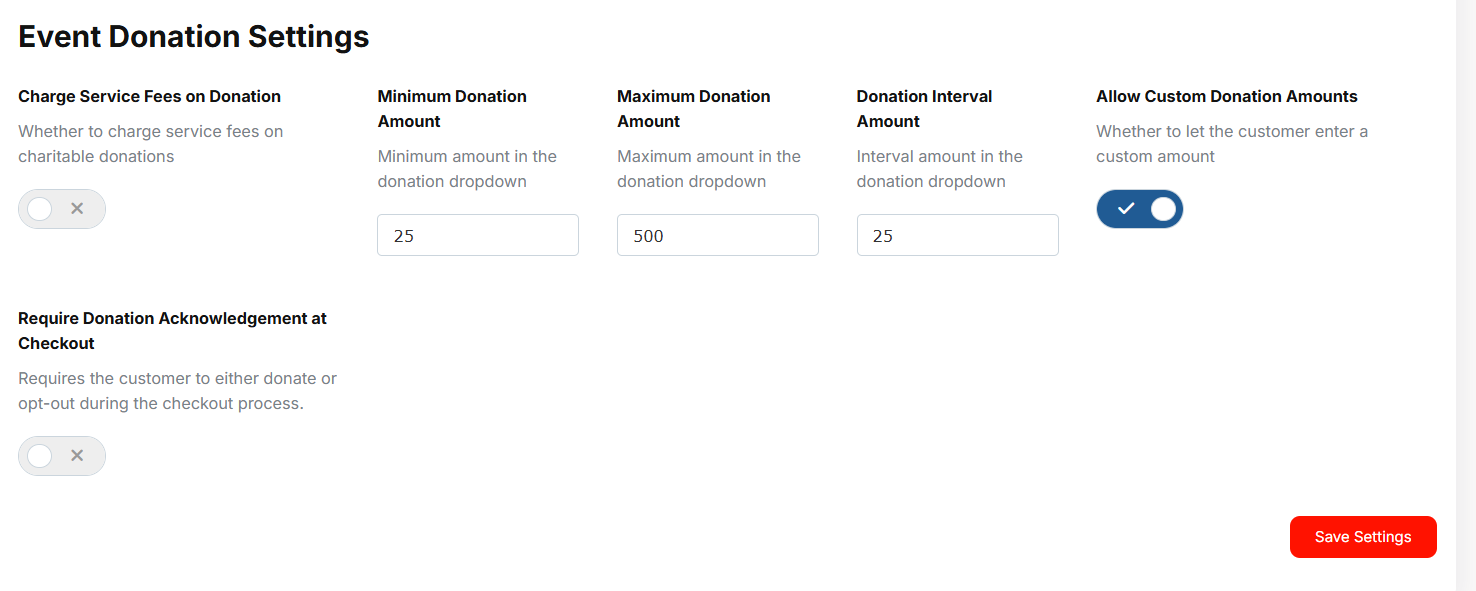
Customize Event Donation Settings
Customize the donation options for your event:
- Charge Service Fees on Donations
- Decide whether to apply service fees (credit card processing fees are always applied).
- Minimum Donation Amount
- Set the lowest amount users can select from the dropdown.
- Maximum Donation Amount
- Set the highest amount users can select from the dropdown.
- Donation Interval Amount
-
Define the step increments for suggested donation amounts.
(For example, if the minimum is 25 and the maximum is 100, and the interval is 25, the options will be 25, 50, 75, 100.)
-
- Allow Custom Donation Amounts
- Let users enter their own donation amount.
- Require Donation Acknowledgement at Checkout
-
Require users to either donate or actively opt out to complete checkout.
-
- Charge Service Fees on Donations
- Save Settings
Note: If you do not want to accept donations on a sold out event, we suggest disabling tickets via Ticket Settings.
